Thursday, June 30, 2011

Photography

There is something so beautiful about photography to me.  As I am diving deeper into my passion of photography and learning and absorbing, I am seeing my pictures transitioning from snap-shots to art.  I am seeing freezing an image into creating a moment to remember and capturing all the emotion that goes with it.

Here are some images over the past week or two, and a little bit about why I love them:

This is a picture of my oldest, she just celebrated her 5th birthday.  This to me is bright and beautiful, just like her.  I love the crispness of this shot and the bright colors.

Ahhh - my little man.  This one just makes me laugh.  He is so expressive, has so much emotion, and is all boy - I think looking at this - it just sums that up!

My oldest again.  I love the capture in this one.  I have been working hard at capturing the emotions in the eyes - and I think this one works.  Her eyes are so crisp and clear - and I love that you can see her hand pose in her eyes, and the intensity.


I think this one is one of my favorites.  I don't know what it is about it.  It's artsy and so Hay (my daughter).  For those of you who know Hayhay - you will agree.  There is passion and intensity in her pose, her expression, it's intense - like her.

Another of Hay - I kind of love that she hardly ever looks at me when I have my camera out.  It's her.  She always has a far off look in her eyes, a free spirt.  And - she is always riding around on her Lil' Quad.  I love how the red brick pops, yet blends with the picture.

Bri - she is my little poser - and not a poser in the bad way.  Poser as in - I grab my camera and she knows exactly what to do.  She always has such striking poses.

Another one of Hay.  You can tell when she is smiling and looking at the camera that it is real emotion.  She is so raw.  Such joy.

 Another one of Hay - she just captivated me on this day.  This makes me smile because of her soft expression - but more so - what she was smiling at.  Her father had striped my little man down and was hosing him down - quite the site - and yes - I have pictures of that as well.  Probably not one that he would want me to post.  So we won't go there.

Ok - my little man - he is all boy - have I mentioned he is all boy!  Rough and tumble - just - well - boy!!!  This picture captures the rock in roll in him and the boy.  From his mohawk to his rockin retro ACDC t-shirt.  The intensity (I used that word a lot today) in his expression and that determined look I see all the time.  Love it!

This is my favorite of the three together.  It shows their personalities, their closeness, their beauty. 

If you couldn't tell - this puts my two passions together - photography and my children.  Capturing moments and everyday beauty.

Thursday, June 16, 2011

Accent Photo Gallery Wall

It's been a while since I have written.  I have been trying to focus.

But - one of the things I have been really wanting to do is create a focal point in this awkward nook.  And my latest passion that has taken control of me is photography - so I need a place to put my pictures.  So I give you - my Gallery Wall!!!


So - to start - I go to my ever impressive - super wonderful woman - Ana White!  She has these $10 Ledges.  When I first saw them - I bookmarked them and knew I had to do it.  But I wanted to add a twist.


Then I had this idea of doing a focal wall with wall paper.  I found a few that I pinned on my Pinterest - you can find them here.

So - here is my random nook.  When you walk up my stairs - there it sits.  Awkward, it housed a cheap bench and an old college trunk.  It kept junk.

So to start my adventure - I marked my wall of where I wanted my wall paper.


I was trying to figure out how big I wanted it to cover the wall - so I looked at 3 strips wide and 4.  I went with the larger size!  I did 4 strips.

Then I picked my wallpaper - ok ok - my wonderful husband picked it - yes i'll admit he has better taste than me - we make a good team!


This is totally my first time wallpapering.  And - I will not be doing this professionally any time soon.  So I gathered my tools.  First things first - I had to get four equal pieces - that also lined up. So I measured my height - marked my line and cut.

But - because it was a Damask pattern - It had to line up perfect. The paper that I got (from Sherman Williams) had these awesome markings that helped line it up.
 

Now for the wallpaper tools.  My mom let me borrow hers.  I couldn't tell you what any of them did!

To hand wallpaper - you need water.  So - we got a cooler first.  Guess what - didn't fit our wallpaper.  So we ended up - ok - don't laugh - using a baby tub!  It worked great - I didn't take pictures though.

So - we put the first one up....yeah - not perfect - took a lot of rolling.  We lined it up with the corner that we marked.


Here it is with all four pieces up - we got the hang of it at the end. You really need to make sure every piece is wet!!!  So we took a soaked washcloth and kept it close!

Next step was to frame it out.  We bought four of these blocks and painted them white.


Then we just did straight cuts with with some decorative molding.


So we just sat and looked and said how pretty it was...did we want to attempt ledges - what if we messed up?  Wall paper is SO not cheap!


Nope - they look just fine!!!!  I built three - but they didn't really fit all that well - so we went with two.  Good thing - the first one wasn't all that great.  So it worked well with two.  We measured the ledges so that there was about 7 inches away from the edge of the outside frame.  Then we tried to hit the stud's - and anchored 3-4 screws into the wall.


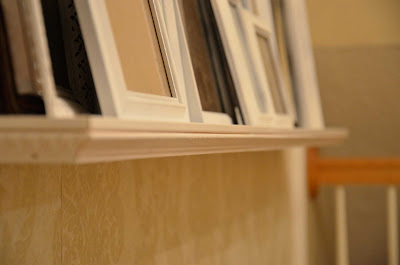
Then I went to my favorite store - Salvation Army - and bought a bunch of frames and sprayed them all white.


This is my first attempt at mitered corners - I think it worked out pretty well.  We used an expensive molding - it was decorative pine dental molding.  It was $10 a piece.  My husband came in the car with them (after we decided to do cheap molding), looks at me and says 'don't mess it up'.  Not his exact words - but you get his drift!


Total cost:
Wallpaper - $70 (Have to buy a double roll - lot's left over)
Outer frame - $30
Ledge - had leftover wood - so free
Trim: $20  ($10 a piece)
All Picture Frames: $40
Total $160 - not bad for a nice focal point.

Now the hard part - picking the pictures!

If you look at Pottery Barn though 2, 4 inch ledges would cost $110, plus tax and shipping.  For me - just the shelves - $20!  And they are more decorative with the fancy molding - and - I can look at it and say - I made that!  There's are 4 feet long - mine were 6 feet long!

Linking up here:
http://www.theshabbychiccottage.net/
http://www.atthepicketfence.com/
http://shabbynest.blogspot.com/
http://thebrambleberrycottage.blogspot.com/
http://frenchcountrycottage.blogspot.com/
http://www.lovinmylovebugs.blogspot.com/
http://funtocraft.blogspot.com/
http://chiconashoestringdecorating.blogspot.com/
Be Different Act Normal
The Creative Crate

Sunday, June 5, 2011

I got a new camera!

We picked up my new camera - we got a Nikon D7000 - I have a lot to learn - but this was my 2nd day with the camera - and one of my favorites I got to today!!!


Can't decide which I like better.  She is my little model - she said "Mommy - take my picture", and gives me that look!  Yeah...and she's only 4 - can I keep her locked up?

(The B&W was an action from The Pioneer Woman - love her actions!)

Thursday, June 2, 2011

Chocolate Covered Pretzel Tutorial

Chocolate Covered Pretzels
Who doesn't love anything covered in chocolate.  I have been looking for favor idea's for my cousins bridal shower.  I wanted something "practical" if you will.  And like I said - who doesn't love stuff dipped in chocolate.

First get everything you need.  I used Pretzel Bags - found them at Joann's - they were only a couple of dollars.
Pretzels - try not to go cheap on them.  Buy more than you need - because they will break!
 

I counted out my pretzels and put them in a bowl so I didn't have to keep digging in the bag.

And Chocolate - duh!

Wax paper, Parchment paper, freezer paper.


So - set up a "double boiler". Fill in the bottom pan with water - put your other pan on top - and dump your chocolate in.

And keep stirring until it's melted.

Next pour yourself a glass of beer.  Ok - just kidding - but - if it helps! You will need a nice tall glass of some kind.

See - you need it to pour the chocolate in!

So you can dip the pretzel in!  It will give it some nice coverage without a lot of work!


Then lay it on the wax paper to dry.

So do them all and let them dry.  I learned at the last batch - if you "twist" them as you take them out of the cup at the lip part of it - it creates a really cool look on the pretzel - and saves you some chocolate!

Then get another color - put them in a little container - and do about :30 sec bursts in the microwave until melted.

 Put the melted chocolate in a ziploc bag.

Tada

Then clip one of the corners.

Drizzle it along all the pretzels - don't they look pretty!

You can see the top layer all lays together across all the pretzels.

Break them apart.

And then just clean up the edges - the chocolate breaks right off.

I put two in each little bag - a white chocolate with pink, and milk chocolate with blue.  The bags came with twist ties included.


All packaged and in a box ready for the shower on Saturday!

Linking to these parties!

LinkWithin

Related Posts Plugin for WordPress, Blogger...