
Do you want to learn how to sew a custom blanket for someone?

First I cut out the letters. You can do it a couple ways. If you have a die cutting machine, you can use that (i'll do a tutorial on that later). My blade is getting dull - so I cut out the letters on Freezer paper on my Cricut, then ironed it on to my fabric - and cut them out.

Line them up on your blanket.
Then grab your Heat N' Bond. This stuff is awesome!


You iron it on to the letters. I cut mine into small strips - just enough to secure it to the blanket with out having to use pins.

Now - before you iron on the letters - make sure you peel off the white part.


Then line them up and grab your Iron.

Iron them on nice and good.

Next - get the thread that you are going to want to sew the letters on to the blanket.

Set your machine. You are going to want Zig Zag - and a tight stitch - probably 1 or 2.

You are also going to want the widest width - mine was done at 5.

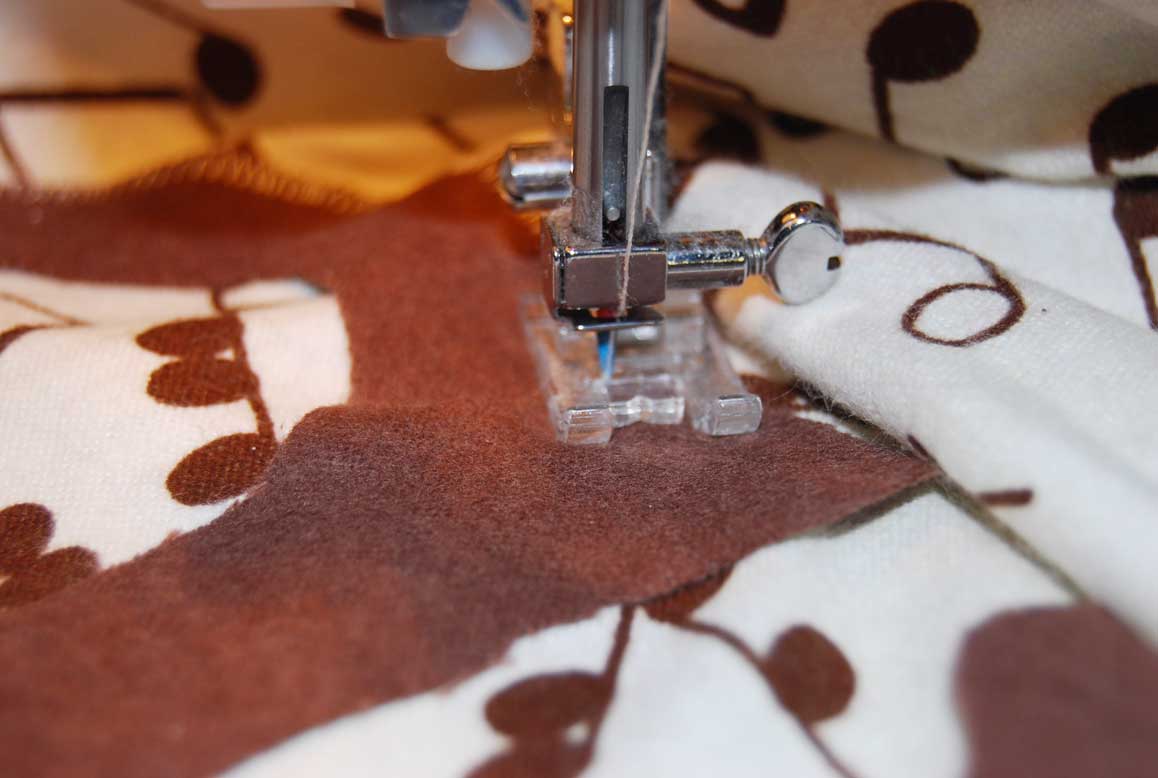
Then line up needle so the right side where the needle goes down is right on the outside of the letter and the blanket. You are going to just outline the letter with your zig zag stitch.

Now - when you are getting to a corner. Keep your needle down, lift up your foot, and rotate, put down the foot, and then continue sewing. Just like you do when sewing your blanket and you get to a corner.
When you are done sewing your letters on - sew it like you would a blanket. Remembering to leave an opening to flip it inside out. And check and double check your right sides are together.

Pin your corners well. Minky can be slippery.

I pinned mine right on my ironing board because it was a smaller blanket. I just went across the top, and then down the sides. You will sew around the outside - trim the corners - then top stitch - just like my other baby blanket tutorial here.

Now - brace yourself. I finished sewing and noticed a BIG FAIL - I started laughing and thought - wow - this is so typical of me! See anything wrong with this picture!

Yeah - my a is totally backwards!!!! Actually - it's upside down - so - when you are ironing and then sewing - double check all your letters and placement. This is for my new baby niece for her baptism this weekend. My brother can just laugh at me :)
Here is the up close detail of the letters.

Let's on the good one - that I didn't line the letters up the wrong way.
Hope you will take on a project like this - they come out super cute and aren't that bad to make. I used flannel on one side - and a minky side on the other.
Linking up to these parties: Funky Junk Interiors - Saturday Nite Special, Tatertots and Jello - Weekend Wrap Up Party, Be Different Act Normal, Passion for Paint, Between Naps on the Porch
