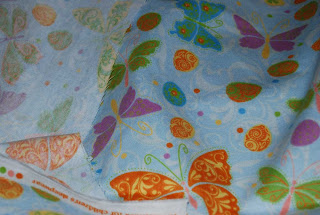
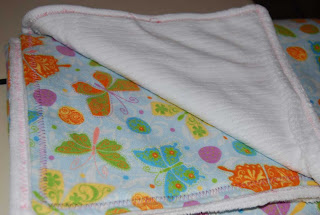
I made a bunch of blankets for Christmas. I believe it was 7 - 7 blankets with names on them. From that - I had my SIL - actually 2 SIL's ask if they could get blankets. So here is my first one - done. I took flannel that was on sale at Joanne's and then Chenille (LOVE this stuff - so super soft!), but so super expensive too. Get it on sale!
So here is my flannel material. I bought 2 yards. I don't use 2 for the blanket - I typically use the excess to cut the name out and sew it on.
This is the Chenille material I bought a whole bolt because during Black Friday it was like 60% off or more - then additional money off my total - so I stocked up.
Now - I am a cheap - no - thrifty crafter! I make the MOST use out of all my material. So - how I found to do this - is take soft material - I rolled it off the bold - so it was still folded. Then I took the flannel the short side - I think it is the 36 in side - or 45 in side. Lined them up - and cut along the side. This probably makes no sense.
This is the side that I cut - it may show it a little better how I make the most of my material.
Then spread out the whole thing on the floor and get to pining. Put your right sides together - and wrong sides out. Then check to make sure the rights sides are together - then check one more time. The reason I say this - I can't tell you how many times I sewed the wrong way!
When you think you are done pining - then pin some more. Chenille is very slippery. Pin Pin and Pin some more.
Make sure you leave a gap! You are going to have to turn it inside out and top stitch.
Then you got it - pin some more - I pinned about ever 2 inches.
Then go to your sewing machine. I am in a lot - the only reason is my pin job was not the best - and where the white is - is where my flannel started.
When you get to the corner - put your needle down - lift your foot - and then spin your fabric - put the foot down, and start sewing again. This will give you a tight corner.
I sew this on a straight stitch.
This is reminding you NOT to sew your opening.
Make sure when you are stopping and starting - to reverse stitch to lock the stitch in place so it doesn't unravel.
When you are all done - take your corner
And Trim it! This makes it less bulky when you turn it right side out.
I then Iron (really quickly to be quite honest with you), the outside of the blanket - so when I top stitch they line up pretty well. Make sure you push out your corners really well.
Then I put it on the zig zag stitch.
Then I also put it on the width of 5 - the width to the widest so it gives a nice zig zag.
I also pin the opening to make sure when I top stitch over it, it seals well.
Then - get ready to top stitch. I have the foot follow the outside of the fabric. Also - make sure you have enough thread! I have run out before - it is not fun - because I didn't have the color - and didn't want to go back to the store. Also - make sure your bobbin is filled. There is nothing like having to stop your top stitch - to re thread - or re-wind your bobbin.
Ahhh - this happened to me so many times - I hate when this happens - I need a new sewing machine. Or perhaps to clean mine.
Ta-da - it's done!!!! Nice and soft on both sides - and a huge baby blanket for a baby shower.
You can package it with a nice ribbon - and you are a done - a thrifty baby blanket, handmade with love! If I can do it - trust me - you can do it - you really only have to know how to sew a straight line.
Sorry if there are typo's - it's super late - and my bed is calling me after a long long day.


Cute blanket!!! Nice packaging idea!!
ReplyDeleteHave a great day!!
Love this too - you are so talented! I haven't made one quite as big. I love that white Chenille and I also got it on sale but should have bought more!!!
ReplyDeleteJess
jbeelightful.blogspot.com