Showing posts with label sew. Show all posts

Saturday, April 9, 2011

Personalized Baby Blanket

Do you want to learn how to sew a custom blanket for someone?
First I cut out the letters.  You can do it a couple ways.  If you have a die cutting machine, you can use that (i'll do a tutorial on that later).  My blade is getting dull - so I cut out the letters on Freezer paper on my Cricut, then ironed it on to my fabric - and cut them out.


Line them up on your blanket.

Then grab your Heat N' Bond.  This stuff is awesome!

You iron it on to the letters.  I cut mine into small strips - just enough to secure it to the blanket with out having to use pins.

Now - before you iron on the letters - make sure you peel off the white part.


Then line them up and grab your Iron.


Iron them on nice and good. 

Next - get the thread that you are going to want to sew the letters on to the blanket.


Set your machine.  You are going to want Zig Zag - and a tight stitch - probably 1 or 2. 

You are also going to want the widest width - mine was done at 5. 

Then line up needle so the right side where the needle goes down is right on the outside of the letter and the blanket.   You are going to just outline the letter with your zig zag stitch.

Now - when you are getting to a corner.  Keep your needle down, lift up your foot, and rotate, put down the foot, and then continue sewing.  Just like you do when sewing your blanket and you get to a corner. 
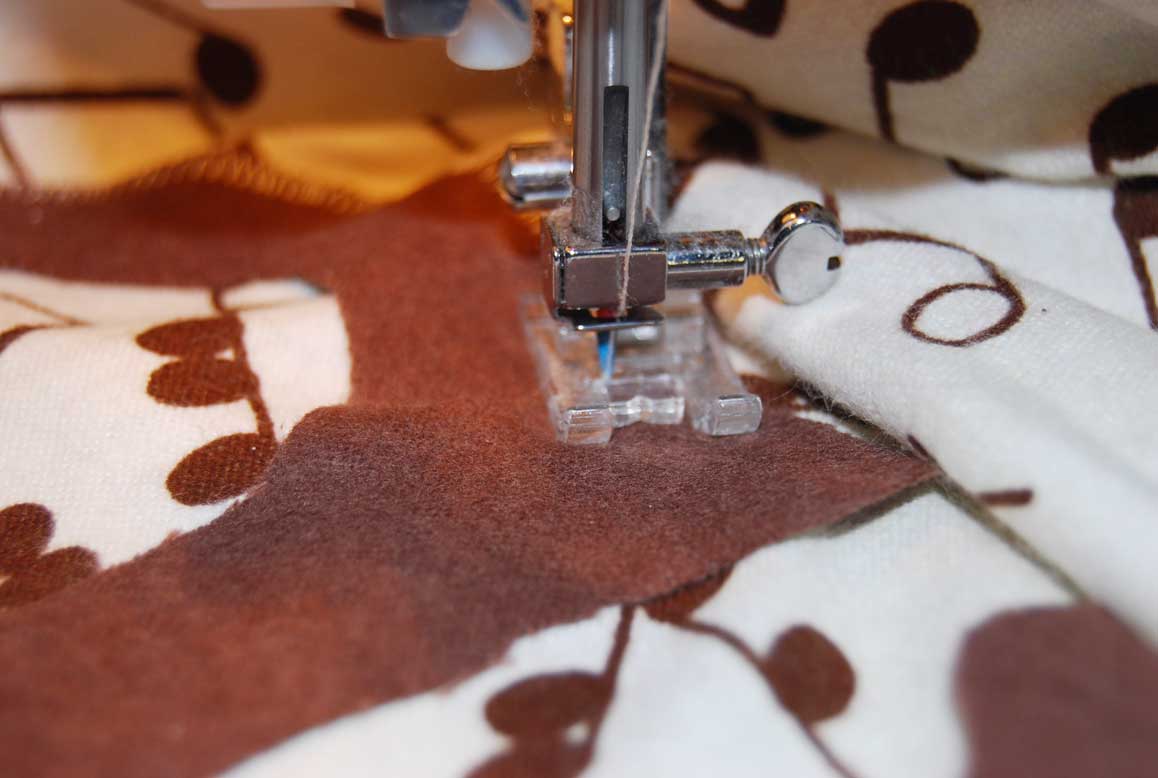
When you are done sewing your letters on - sew it like you would a blanket.  Remembering to leave an opening to flip it inside out.  And check and double check your right sides are together.

Pin your corners well.  Minky can be slippery. 

I pinned mine right on my ironing board because it was a smaller blanket.  I just went across the top, and then down the sides.   You will sew around the outside - trim the corners - then top stitch - just like my other baby blanket tutorial here.

Now - brace yourself.  I finished sewing and noticed a BIG FAIL - I started laughing and thought - wow - this is so typical of me!  See anything wrong with this picture!


Yeah - my a is totally backwards!!!!  Actually - it's upside down - so - when you are ironing and then sewing - double check all your letters and placement.  This is for my new baby niece for her baptism this weekend.  My brother can just laugh at me :)


Here is the up close detail of the letters.

Let's on the good one - that I didn't line the letters up the wrong way.

Hope you will take on a project like this - they come out super cute and aren't that bad to make.  I used flannel on one side - and a minky side on the other.

Tip Junkie handmade projects

Wednesday, March 2, 2011

Baby Blanket tutorial

I made a bunch of blankets for Christmas.  I believe it was 7 - 7 blankets with names on them.  From that - I had my SIL - actually 2 SIL's ask if they could get blankets.  So here is my first one - done.  I took flannel that was on sale at Joanne's and then Chenille (LOVE this stuff - so super soft!), but so super expensive too.  Get it on sale!

So here is my flannel material.  I bought 2 yards.  I don't use 2 for the blanket - I typically use the excess to cut the name out and sew it on.

This is the Chenille material I bought a whole bolt because during Black Friday it was like 60% off or more - then additional money off my total - so I stocked up.


Now - I am a cheap - no - thrifty crafter!  I make the MOST use out of all my material.  So - how I found to do this - is take soft material - I rolled it off the bold - so it was still folded.  Then I took the flannel the short side - I think it is the 36 in side - or 45 in side.  Lined them up - and cut along the side.  This probably makes no sense. 


This is the side that I cut - it may show it a little better how I make the most of my material. 


Then spread out the whole thing on the floor and get to pining. Put your right sides together - and wrong sides out.  Then check to make sure the rights sides are together - then check one more time.  The reason I say this - I can't tell you how many times I sewed the wrong way!


When you think you are done pining - then pin some more.  Chenille is very slippery.  Pin Pin and Pin some more.


Make sure you leave a gap!  You are going to have to turn it inside out and top stitch.


Then you got it - pin some more - I pinned about ever 2 inches.


Then go to your sewing machine.  I am in a lot - the only reason is my pin job was not the best - and where the white is - is where my flannel started.


When you get to the corner - put your needle down - lift your foot - and then spin your fabric - put the foot down, and start sewing again.  This will give you a tight corner.


I sew this on a straight stitch.


This is reminding you NOT to sew your opening.


Make sure when you are stopping and starting - to reverse stitch to lock the stitch in place so it doesn't unravel.


When you are all done - take your corner


And Trim it!  This makes it less bulky when you turn it right side out.


I then Iron (really quickly to be quite honest with you), the outside of the blanket - so when I top stitch they line up pretty well.  Make sure you push out your corners really well.

Then I put it on the zig zag stitch.


Then I also put it on the width of 5 - the width to the widest so it gives a nice zig zag.


I also pin the opening to make sure when I top stitch over it, it seals well.


Then - get ready to top stitch.  I have the foot follow the outside of the fabric.  Also - make sure you have enough thread!  I have run out before - it is not fun - because I didn't have the color - and didn't want to go back to the store.  Also - make sure your bobbin is filled.  There is nothing like having to stop your top stitch - to re thread - or re-wind your bobbin.


Ahhh - this happened to me so many times - I hate when this happens - I need a new sewing machine.  Or perhaps to clean mine.


Ta-da - it's done!!!!  Nice and soft on both sides - and a huge baby blanket for a baby shower.


You can package it with a nice ribbon - and you are a done - a thrifty baby blanket, handmade with love!  If I can do it - trust me - you can do it - you really only have to know how to sew a straight line.


Sorry if there are typo's - it's super late - and my bed is calling me after a long long day.

LinkWithin

Related Posts Plugin for WordPress, Blogger...