Showing posts with label wood. Show all posts

Saturday, October 20, 2012

Boy's Bedroom Makeover

My little man turned 3 and I wanted to update his room!


I was inspired by the storage from Kate over at Outnumbered with her toy room makeover.  Didn't she do an amazing job!
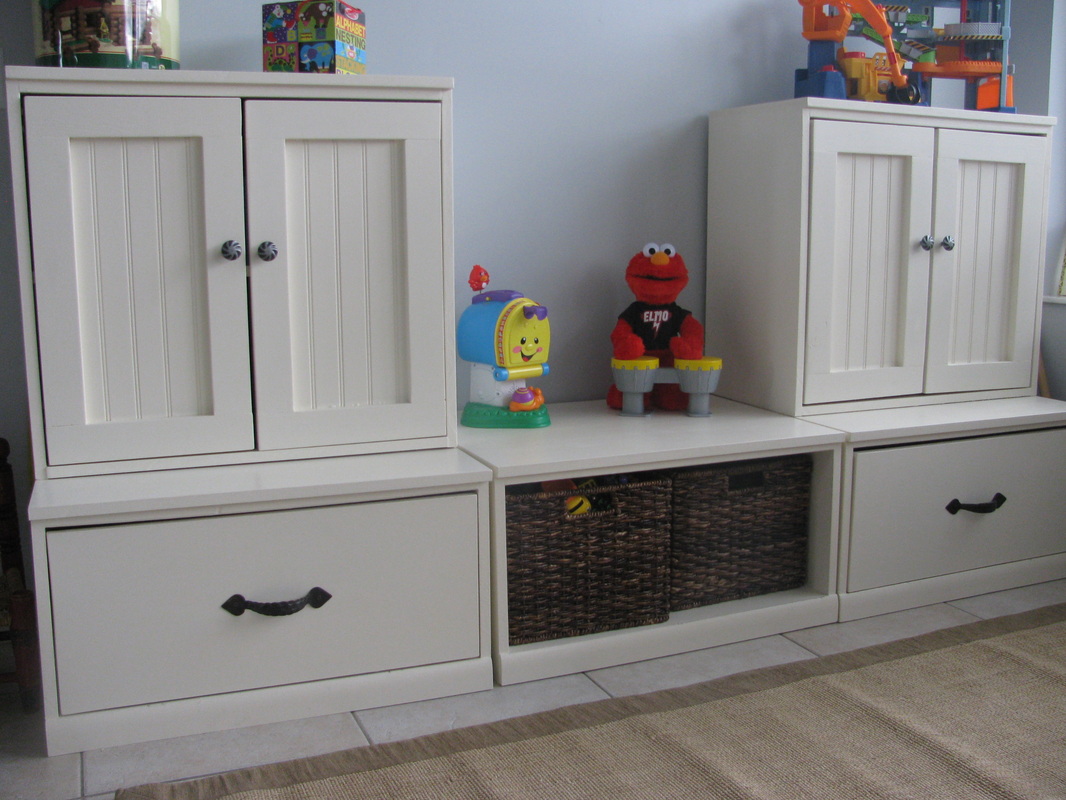
I used the following plans from Ana White - there was the Open Base and then the cubbies.

Here is a bad before - I forgot to take a before - before I started painting.


Then I got painting:


Then I finished the closet:
Here is the before.


Then I added the closet:

I added a few signs that I made with my cricut.


Then I got all the boards cut - and then painted....

Then I put it all together!

They each have the cubbies storage inside.


He has a little reading nook - I made the shelfs too - guess from who - yup - Ana White - I just made them shorter to fit.


 I made the step stool from Ana White's plans here:

I made all three sighs.  The Truck, Bus and Car, the Star Wars and the Alphabet.  I spelled out M-I-K-E-Y in orange.


I have to say - I am super proud of his room! The investment for the closet was around $120, I had paint on hand.  The investment for the storage for the toys was about $220 - that included the bins, sheets of plywood (I used cabinet grade plywood - I wanted it to last), wainscoting, the totes, hinges, and knobs.  It took a little over a week - I painted it before it was assembled, and sanded in-between each coat of primer and paint.

So let's take a look again at the Before and Afters:


Sunday, September 9, 2012

DIY Step stool for the kids

Well - I had another crazy productive weekend.  I should learn to take a break...

I had built my middle child a step stool when I did her bedroom. And it always makes it's way into everyone else's room.  So I thought I would make these stools here.  I just adore Ana White.  I am really working on turning my house into a homemade house....But anyways.

Here are the step stools I made - they are perfect for getting in and out of bed - brushing their teeth - trying to get their clothes on a top shelf.

So this one is Haydens - the first one I built. She wanted it Pink.

I did this one today - out of scraps - FREE!!!  Whooo hooo.  She wanted green - it goes with her room.

Then a little sneak peak to Mikey's room - this is the accent color in his room.

Then here is a quick sneak peak at one corner in his room.  I am super excited!


Oh - and we got a dog pen built for our new puppy!  We kind of winged it - and it worked out great.

Saturday, September 1, 2012

Bins for the Mudroom

I just realized now that I didn't post pictures of the mudroom we did.  So here it is - with the bins I made.

It started as a pantry with doors - and it drove me crazy!!!  So the doors came down and everything on the inside was built.


It has been done for a while, but wasn't finished.  So I made the bins and added a shelf to add more shoes on the bottom.


Before it was just a big huge square and the shoes were always all over the place.  Now there is a shelf to help organize them!

Then the bins - there is 5 in total.  I got the idea from the amazing Jamie at That's My Letter with this plan.

I think I am going to monogram them with everyones initials.

I painted them the same color as our front entry to bring the two rooms together.

I am happy that it is done. Well almost - a little trim to replace. But - we are

LinkWithin

Related Posts Plugin for WordPress, Blogger...