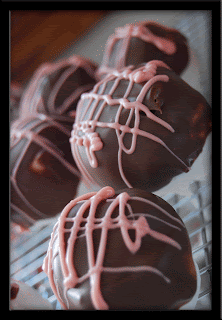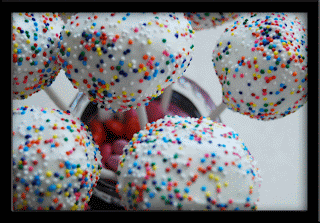
Ok - so here are my awesome Cake Pop's!!!! These are awesome - Awesome and oh so pretty!
OK - I seriously could not stop taking pictures of these beauty's!!!! I am hosting a shower in a few weeks so I am doing a trial run - to make sure they can look and taste how I want them to - and we have a winner!!!!!
I bought a cake pop recipe book - if you don't own one - I highly recommend one! They rock!! So many awesome and creative ideas.
Silly me didn't take pictures of all the steps. But you bake a cake, when it cools, crumble it up into little pieces, then mix frosting in. It said 1/2 a cup - I should have used more, and next time I will. It should be sticky - but not overly sticky. If you do it a few times, you'll get the hang of it.
So then you roll them into balls and chill for a few hours. Then you dip the stick in frosting, and chill again. This is so when you dip them pop's they don't get stuck in your chocolate.
When it's time do dip - make sure you use a deep cup, I used a call but thin drinking glass - that way you don't have to use as much chocolate to get it coated.
So - I went to dunk them, and I got thinking - how the heck am I going to make these look pretty without a holder to hold them straight - there goes my creativeness :) OK - cheapness for not wanting to buy a new tool to have in my kitchen.
So - below you will see my pretty pop's chillin out in a cooling rack :) I put 4 soup cans - 2 on each sign. to hold it up tall enough that the sticks touched the counter, and the pop's were tall enough on top.

 This is where they were cooled, and I wanted to start dunking some in other colors. OH - BIG NOTE HERE. I thought I was going to be crafty/cheap. I wanted other colors - So I added food coloring to the white chocolate melts - guess what - it DOESN'T work!!! There is a reason they sell all the colors the do - buy a few. I am glad I tested it with a small amount first!
So then I took the white pop's and dunk them in pink and brown. Then after that I put the opposite color in a freezer bag (just a couple - like 4-5 wafers), microwaved them, cut a small part of the corner off, and just ran it quickly around the edges.
Trust me - these are SO good, so pretty - they will be a hit at any party, kid adult. They can look fun and young, or classy!
I love comments - let me know what you think. If you have made them and posted, leave me a comment with your link - would love to see yours!
Parties: (check them out - there is a lot of great stuff - leave comments - it will make everyones day!)
My Backyard Eden
Sew Much ado
Someday Crafts
Tea Rose Home
The Thrifty Home
Blue Cricket Design


They look great! I've made them before - just in ball form, not on sticks, and they weren't nearly as pretty. They did taste fantastic though!
ReplyDeleteadorable... Makes me want to run right out and get a cake pop book and get the materials to make some of my own... Great job.
ReplyDeleteThose are soooo dang awesome! Saving this one for the next party I host!!
ReplyDeletei'm your newest follower...come check out my blog when you get a chance... www.itsapricelesslife.blogspot.com
Shantel :-)
YUM!! I would love to see this on my weekend linky party! Great shower or birthday idea :)
ReplyDeleteLook awesome! I am sure everyone will be impressed!
ReplyDeleteWhat an adorable gift! Ever since i saw cake pops on someone's blog, i've loved them, they're so cute!
ReplyDeleteTnx so much for linking up at my party, i hope to see you there again next weekend! :)
Have a lovely weekend!
I'm going to attempt Cake Pops for my daughter's birthday. Thanks for all your little tips! I too am going to do a trail run before the big day. :)
ReplyDelete